Two Wheel
A localizer that uses two odometry wheels
Prerequisites
Ensure that two odometry pods are connected: one that is parallel to the length of your chassis and another that is perpendicular to your chassis length. These should be plugged into ports that have motors on them preferably. Due to technical limitations on REV hubs, encoder ports 0 and 3 are the fastest and are reccomended for both pods
Setup
In Constants.java, add an instance of TwoWheelConstants. Make sure to replace the hardware map names
with the actual names of the motor port they are plugged into. You must also set the
IMU orientation to match the orientation of your Control Hub.
public static TwoWheelConstants localizerConstants = new TwoWheelConstants()
        .forwardEncoder_HardwareMapName("leftFront")
        .strafeEncoder_HardwareMapName("rightRear")
        .IMU_HardwareMapName("imu")
        .IMU_Orientation(
            new RevHubOrientationOnRobot(
                RevHubOrientationOnRobot.LogoFacingDirection.UP,
                RevHubOrientationOnRobot.UsbFacingDirection.LEFT
            )
        );
Then, add .twoWheelLocalizer to createFollower:
return new FollowerBuilder(followerConstants, hardwareMap)
    .twoWheelLocalizer(localizerConstants)
    /* other builder steps */
    .build();
Offsets
You must also set your odometry pod offsets, which is where they are relative to your robot's center of rotation. You can use the diagram below to find them. Offsets are in inches.
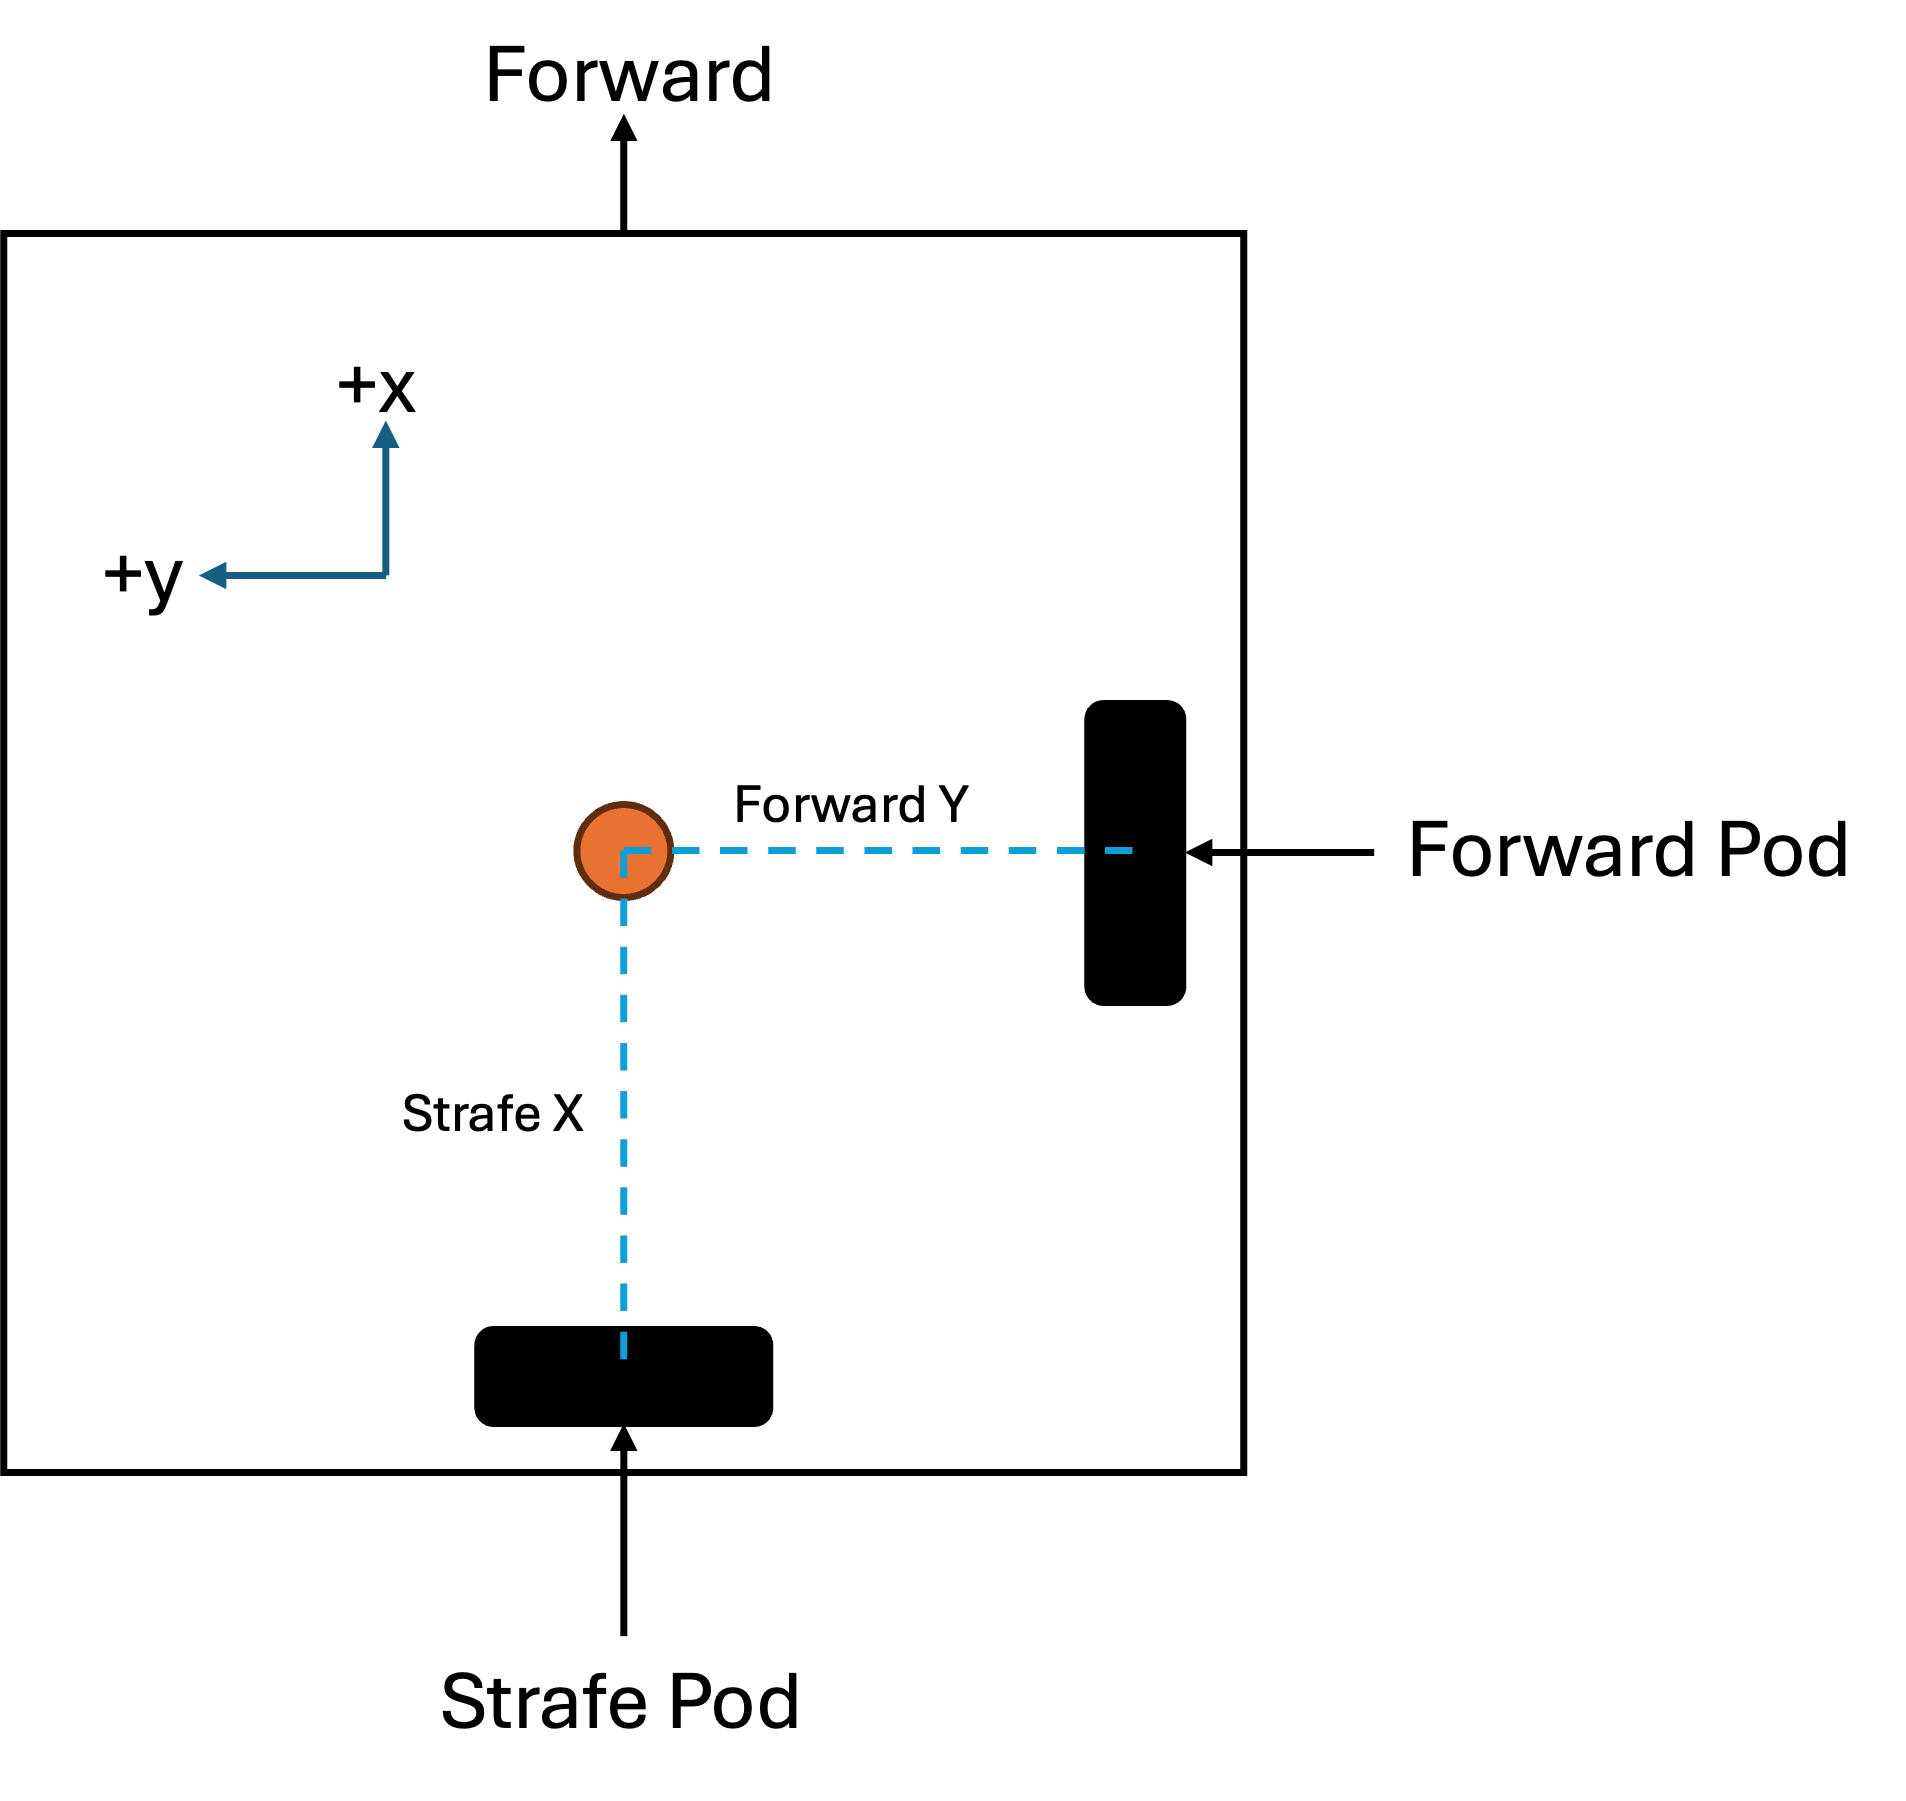
Once you have found your offsets, add them to your localizer constants by
using .forwardY() and .strafeX().
Tuning
Encoder Directions
We will now determine the encoder directions. First, select and run localization test under the localization folder in the tuning OpMode. Then, move the robot forward. The x coordinate should increase. Next, move the robot left. The y coordinate should increase. If either of those does not happen, you must reverse the respective encoder. To reverse an encoder, add
To reverse an encoder, add one of the following to TwoWheelConstants:
.forwardEncoderDirection(Encoder.REVERSE)

// and/or:

.strafeEncoderDirection(Encoder.REVERSE)
Forward Tuner
We will now adjust multipliers that convert encoder ticks into real-world measurements: inches. This ensures your localizer's readings are accurate.
Tip
It is recommended that you run these tests multiple times and average the results, as it can result in more accurate localization.
In the tuning OpMode, under localization, select and start the forward tuner. Then, push the robot forward 48 inches (exactly 2 field tiles). This distance is configurable if needed. Once you push the robot forward, two numbers will be displayed on telemetry:
- The distance the robot thinks it has traveled
- The multiplier; this is the number you want.
Add the multiplier to your TwoWheelConstants by adding the following.
.forwardTicksToInches(multiplier)Lateral Tuner
The lateral tuner is very similar to the forward tuner, except it is sideways. In the tuning OpMode, under localization, select and start the lateral tuner. Push the robot left 48 inches (exactly 2 field tiles). As with the forward tuner, this distance is configurable.
Lastly, add the multiplier to TwoWheelConstants by adding the following line.
.strafeTicksToInches(multiplier)Testing the localizer
Once you have completed the tuning steps, you can test your localizer as described on the localization page.
Congratulations on successfully tuning your localizer!
Troubleshooting
If you have any problems, see the (troubleshooting page)[/docs/pathing/tuning/troubleshooting].
Last updated on