Pinpoint
A localizer that uses the goBILDA Pinpoint Odometry Computer
Prerequisites
Ensure that two odometry pods are connected: one that is parallel to the length of your chassis (forward) and another that is perpendicular to your chassis length (lateral). These should be plugged into the pinpoint (forward goes to port y and lateral to port x). The pinpoint should be connected to a REV Hub through an I2C cable (not to port 0 beacuse the IMU is there).
Default Values
In Constants.java, add an instance of PinpointConstants. Make sure to replace the pinpoint hardware map name
with the actual name. If you are using the quickstart, this instance should already be there.
public static PinpointConstants localizerConstants = new PinpointConstants()
            .forwardPodY(-5)
            .strafePodX(0.5)
            .distanceUnit(DistanceUnit.INCH)
            .hardwareMapName("pinpoint")
            .encoderResolution(GoBildaPinpointDriver.GoBildaOdometryPods.goBILDA_4_BAR_POD)
            .forwardEncoderDirection(GoBildaPinpointDriver.EncoderDirection.FORWARD)
            .strafeEncoderDirection(GoBildaPinpointDriver.EncoderDirection.FORWARD);
Then, add .pinpointLocalizer to createFollower:
return new FollowerBuilder(followerConstants, hardwareMap)
    .pinpointLocalizer(localizerConstants)
    /* other builder steps */
    .build();
Offsets
You must also set your odometry pod offsets, which is where they are relative to your robot's center of rotation. You can use the diagram below to find them. Offsets are in inches.
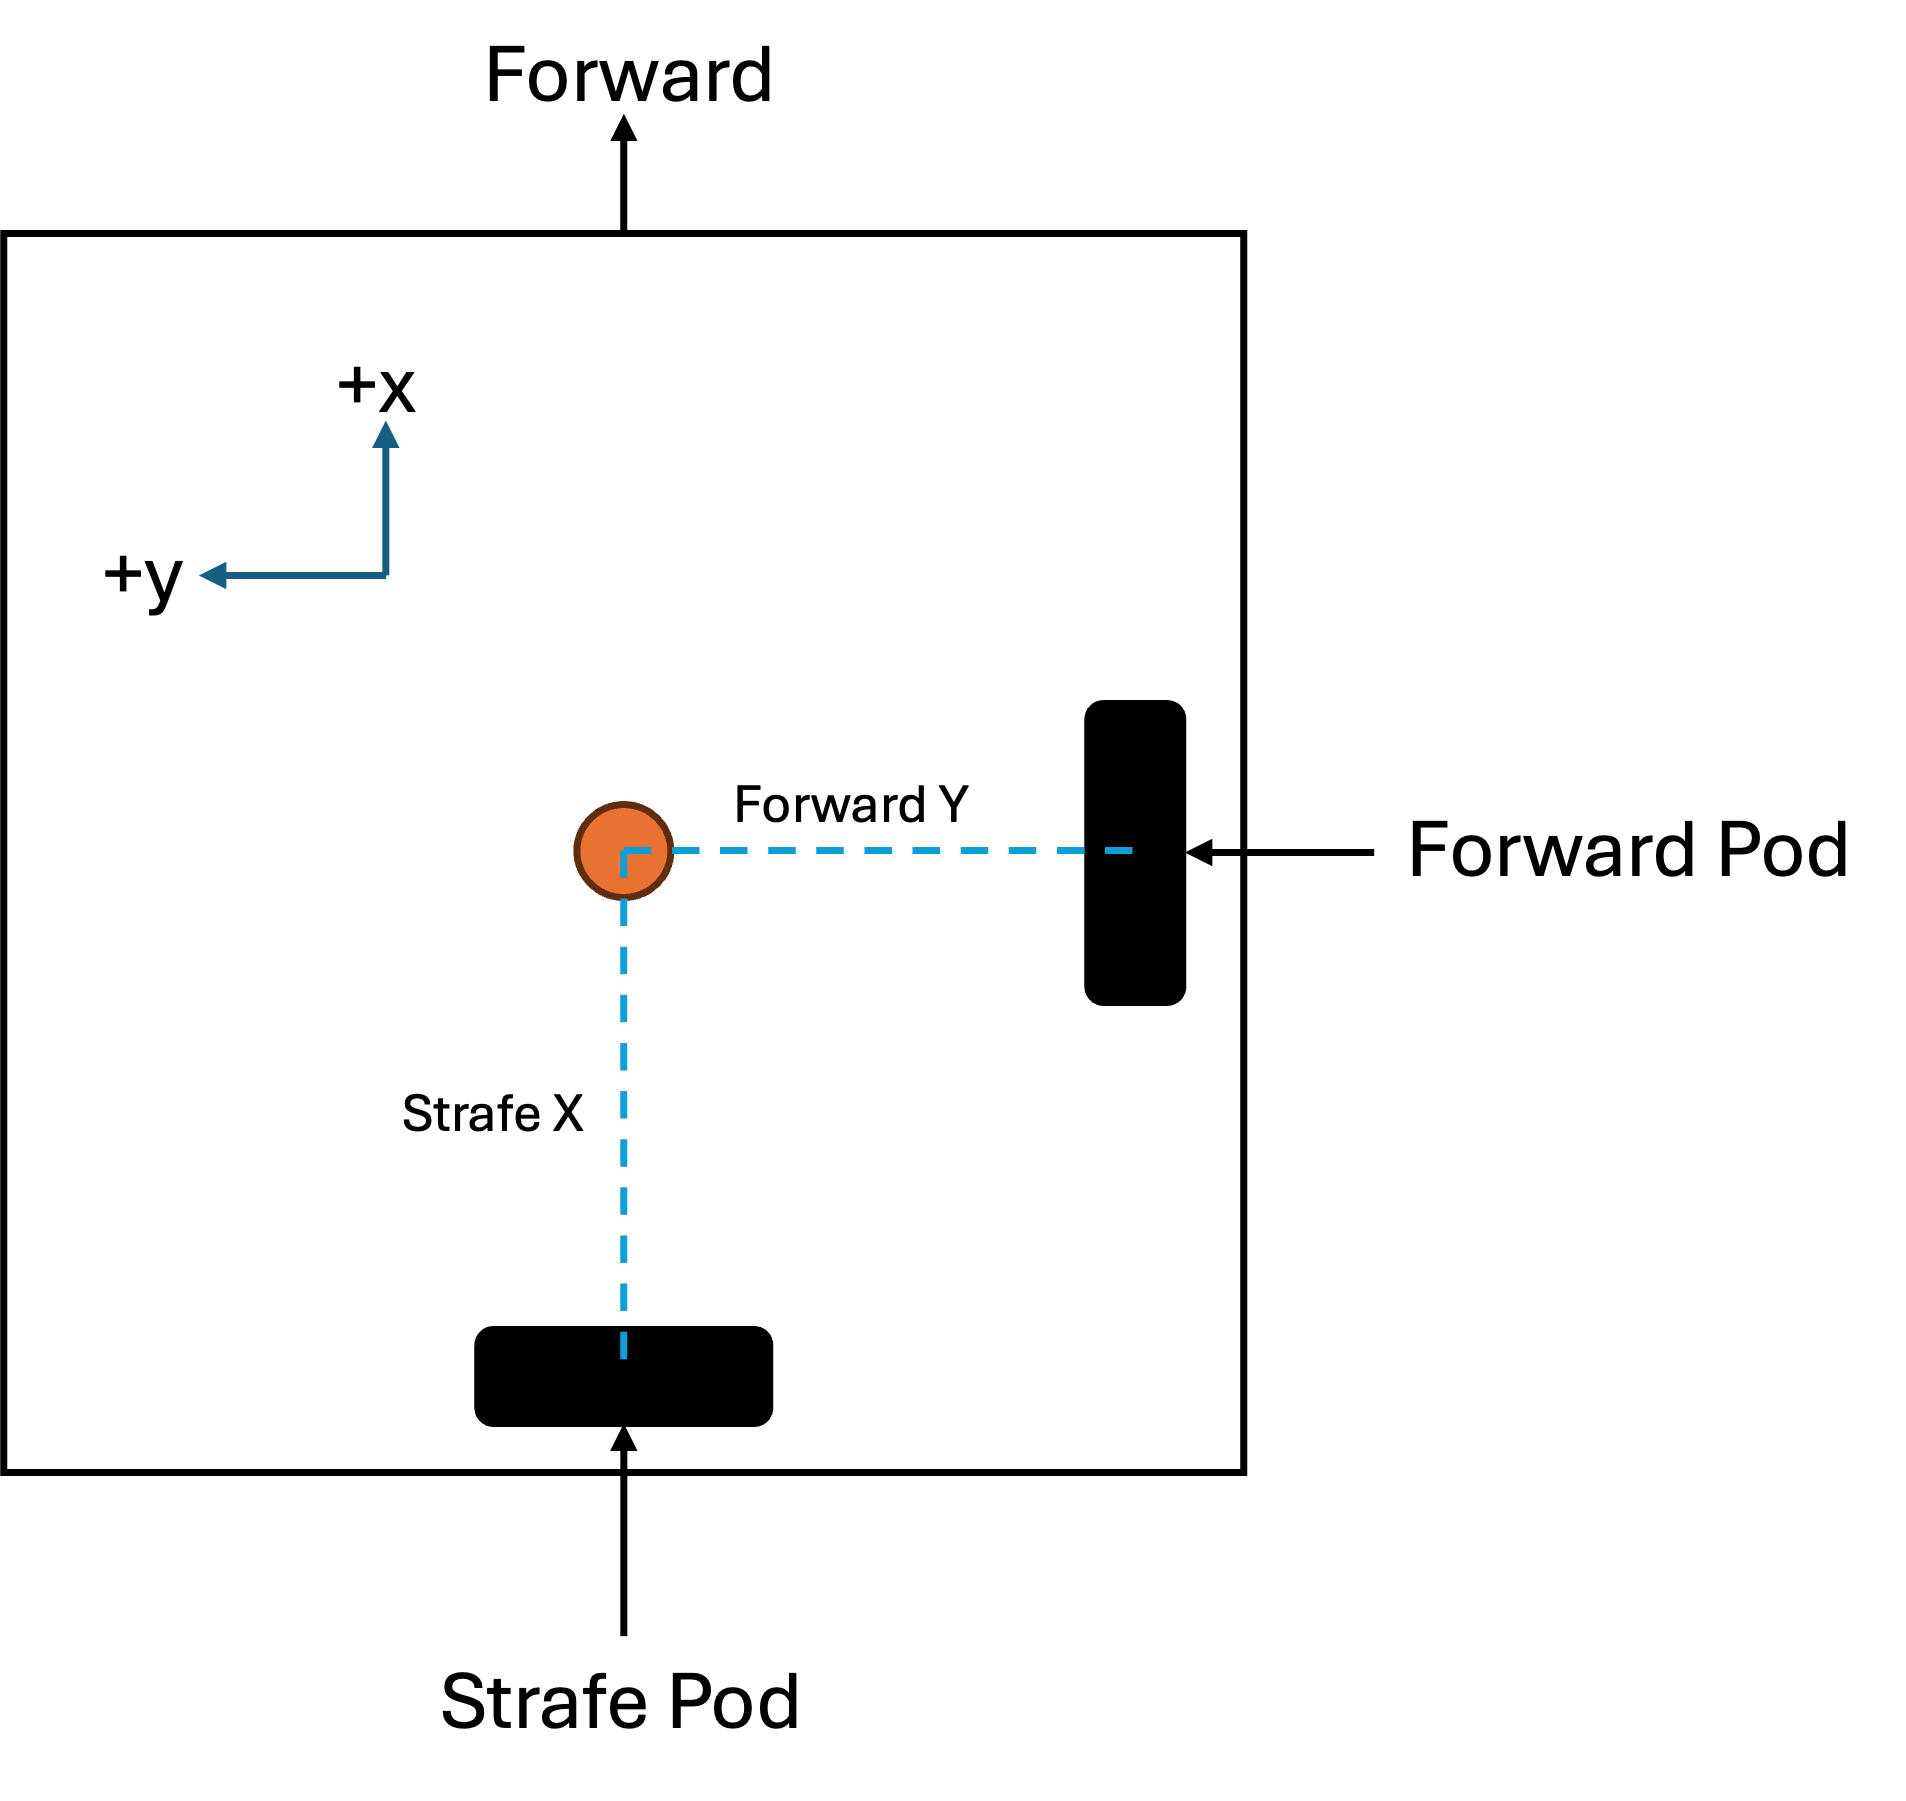
Once you have found your offsets, add them to your localizer constants by
using .forwardY() and .strafeX().
Encoder Resolution
By default, the encoder resolution is set to GoBildaPinpointDriver.GoBildaOdometryPods.goBILDA_4_BAR_POD. If you are
using a custom odometry pod, go back to your localizerConstants variable and replace .encoderResolution() with
.customEncoderResolution() and input your encoder resolution.
Encoder Directions
We will now determine the encoder directions. First, select and run localization test under the localization folder in the tuning OpMode. Then, move the robot forward. The x coordinate should increase. Next, move the robot left. The y coordinate should increase. If either of those does not happen, you must reverse the respective encoder. To reverse an encoder, add
To reverse an encoder, add one of the following to PinpointConstants:
.forwardEncoderDirection(Encoder.REVERSE)

// and/or:

.strafeEncoderDirection(Encoder.REVERSE)
Yaw Scaler
If you want to use a yaw scaler, you can set the yaw scalar by doing yawScalar in PinpointConstants and inputing
your yaw scalar.
NOTE: The yaw scalar overrides calibration done by GoBilda, and it is reccomended that you dont edit this unless there is a reason to change it.
Testing the localizer
Once you have completed the tuning steps, you can test your localizer as described on the localization page.
Congratulations on successfully tuning your localizer!
Troubleshooting
If you have any problems, see the troubleshooting page.
Last updated on